Showing posts with label cupcake. Show all posts

Friday, April 1, 2011

Deceptively Delicious April Fool's Food Pranks

Happy April Fool’s Day!  My sister-in-law, Dawn, is the queen of April Fool’s food pranks in the family.  Every year, she tricks her kids with meals and desserts that look like the real thing!  I can not wait until the day that I can fool my little guy but for the time being, I thought it would be fun to try it out on my parents and brother.  My mom came home from work starving so the “grilled cheese” I served her looked very appetizing. You should have seen her face when she bit into that sandwich and realized it was cake! I was literally on the floor laughing! 
Since my parents were home to see me make the meatloaf cupcakes, I couldn’t fool them but I had my next victim in mind, my brother!  I set the stage by sending him a text while he was in school to let him know I made cupcakes.  With his sweet tooth, I can only image how he looked forward to getting home, pouring himself a nice glass of cold milk and biting into what he thought to be a cupcake.  Unfortunately, I was not home to witness his facial expression as he bit into that “cupcake” but I received sweet satisfaction in the form of a text he sent later in the evening saying “lol u got me xD”.  That’s all I needed to hear!  My early April Fool’s Prank was a success.  Here is how I pulled it off:


Meatloaf and Mashed Potato Cupcakes


What you will need for 12 cupcakes:
Turkey Meatloaf:
  • 1 envelope of Lipton Recipe Secrets Onion Soup and Dip Mix
  • I lb. of ground turkey
  • 1/4 cup of an onion, finely chopped
  • 1 cup of bread crumbs
  • 3/4 cup of water
  • 1/3 cup of ketchup
  • 1 egg
Mashed Potatoes:
  • 8 oz packet of Idahoan Original Mashed Potatoes
  • 2 2/3 cups of water
  • 1 teaspoon of salt
  • 4 tablespoon of butter or butter substitute
  • 1 cup of milk
Garnish:
  • Orange Bell Pepper
Hardware:
  • 12 muffin tin
  • 12 foil cupcake liners
  • Large bowl
  • Small plastic bag
  • Vegetable peeler


Directions:
  • Preheat the oven to 350 degrees.
  • Insert the cupcake liners into the muffin pan slots.
  • Combine the meat, onion, onion mix, bread crumbs, egg, water and ketchup in a large bowl.
  • Take small handful of the meat mixture and shape it into 12 balls.

  • Place the meat “balls” into each into the 12 cupcake liners and gently press down so that the mixture fills the liner.
  • Bake for about an hour.  
Prepare Mashed potatoes according to packet:
  • Bring the 2 2/3 cups of water, 1 teaspoon of salt and 4 tablespoon of butter to a boil. Remove from heat.
  • Add one cup of cold milk and stir in potatoes gently. To achieve a smooth consistency, add more milk.
Frosting the cupcakes:
  • Scoop the mashed potatoes into a small plastic bag and cut a small corner off. 
  • Squeeze the “frosting” onto the cupcakes in a spiral motion to completely cover them.

Prepare the garnish:
  • Peel the skin of the pepper with the vegetable peeler and slice the peel into long thin strips.

  • Curl the strips with your finger.
  • Garnish the cupcake with the curled orange pepper skin.


Pound Cake Grilled Cheese


What you will need:


  • Pound cake, thinly sliced
  • 1 cup of your favorite frosting
  • Yellow and red food coloring
  • 16 oz container of your favorite white frosting
  • 1/2 teaspoon of whipped butter or butter substitute
Hardware:

  • Frying pan
  • Small bowl

Directions:

Color the frosting orange:
  • Scoop out half of the container of frosting into a small bowl.
  • According to my box of food coloring, I squeezed 6 drops of yellow food coloring and 2 drops of red coloring to make orange. Stir and continue adding drops of the appropriate color to obtain the shade of orange that resembles American cheese.

Grill the pound cake:
  • Heat up the frying pan.
  • If the pound cake is not precut, cut it into thin slices.
  • Take two slices and butter one side of each slice.

  • Place the buttered side down on the frying pan.

  • Once the pound cake is nicely browned, spread the colored frosting on the other side.
  • Lay the other slice down on top of the frosting, browned-side up. 
  • Gently press down on the sandwich to make the frosting ooze out to look like melted cheese and cut it in half. 
  • Serve and enjoy the reaction!


You can find more fun pranks like these at Family Fun.  What are some of the food pranks you played on someone? I would love to hear your April Fool’s food prank stories!

Thursday, March 3, 2011

Bacon-Wrapped Shrimp & Roasted JalapeƱo with Cheese Dipping Sauce

Happy birthday to my little munchkin who turned ONE yesterday! This week is both an exciting one and a very busy one for me.  My little baby is no longer a baby! Oh, where does the time go? 
I had every intention to make cupcakes from scratch but that is not going to happen at this point.  I baked cupcakes and made a frog cupcake cake for my son's birthday yesterday and need to bake and decorate another round of cupcakes and a small "smash cake”.  I also want to make frog-shaped Rice Krispie cereal treats. Did I mention I also have a mid-term for my class this week? 
Since my theme of this week is parties, a tasty appetizer comes to mind. Claire Robinson’s “Bacon Prawns with Cheese Dip" are wonderful!   Although it is not appropriate for a one year old birthday party, these will definitely make a debut at the next party I host. 

I was excited when I saw this recipe on Claire’s show “5 Ingredient Fix” because it reminded me of the most amazing bacon-wrapped shrimp I once had at a party a couple years ago.  Claire’s shrimp were just as succulent! Even though, Claire wrapped a JalapeƱo in her shrimp, it was not too spicy, at least not for me.  I am not too crazy about spicy food in general but I figured the roasted JalapeƱo wasn’t going to be too bad, which it wasn’t.  I recommend washing your hands right after working with the JalapeƱo!  
I made some minor changes to the original recipe based on my experiences.  I also included directions on how I roasted the JalapeƱos. 
Bacon-Wrapped Shrimp & Roasted JalapeƱo


You will need for 16 servings:
  • 16 thick slices of bacon
  • 8 roasted JalapeƱos, split in half and seeded
  • Olive Oil
  • Salt and Pepper 
  • 16 large shrimp, peeled and deveined
  • 1 1/2 cups shredded Monterey jack cheese 
  • 3/4 cup heavy cream
Hardware:
  • Non-stick baking sheet
  • Toothpicks
  • Paper towel
  • Glass bowl
  • Small pot (optional, you will need this if you are melting the cheese on the stove top.)
Directions:
  • Preheat the oven to 400 degrees.
  • Place the bacon on a baking sheet. Bake until they are half cooked, about 5 minutes or more depending on the cut of the bacon. Drain on a paper towel and set aside until cool enough to handle.


Now, roast the JalapeƱos:
  • Turn the oven temperature up to 425 degrees.
  • Cut the tops off of the JalapeƱos. Next, cut them into half and remove the seeds.


  • Place the JalapeƱo halves on the baking sheet. Drizzle olive oil over the JalapeƱos and season with salt and a little pepper.

  • Roast the JalapeƱos for about 10-12 minutes. Allow them to cool.

Putting all the ingredients together:
  • Assuming the shrimp have been peeled and deveined, place the roasted JalapeƱos around the shrimp and wrap a strip of bacon around the shrimp.  

  • Secure with a toothpick and place them down on a non-stick baking sheet.


  • Bake until the shrimp are cooked, about 10 minutes.  They will turn white.

The cheese sauce:
  • Combine the cheese and heavy cream and microwave it for a minute or two just long enough for it to be fully melted. Stir it to fully blend the cheese and cream. You can also put the bowl over a pot of simmering water, as Claire suggests.  Make sure the bottom of the bowl is not touching the water.  Slowly stir the cheese until it is melted and blended with the cream. 
  • Serve the cheese dip along side of the shrimp and enjoy.

Sunday, February 20, 2011

Vanilla Frosted Chiffon Cupcake Recreation

I am on a quest to find a perfect cupcake recipe for my son’s first birthday party.  I am looking for a fluffy, light and delicious cupcake with a frosting that is not overly sweet. It would also be great if they do not need to be refrigerated. 
I thought I found the perfect recipe when I came across Alton Brown’s “Honey, I Shrunk the Cake” on his show, “Good Eats” but I am not sure if this is “the one”.  I can’t say that I was disappointed in the recipe itself but quite possibly in my own execution of the recipe. What I thought was going to be an easy cupcake recipe turned out to be quite a challenge for a beginner.  First, I could not figure out nor could I find any information online on how to measure 5 1/4 ounces of cake flour so after what seemed like an eternity of online research, I broke down and bought a food scale from Bed, Bath and Beyond.  The second challenge was figuring out what I could use in place of a paddle attachment on my “wanna be” Kitchen Aid stand mixer. I gave up and decided to just use the regular attachment that came with my hand mixer.  
I followed the recipe to the best of my ability and the cupcakes were not terrible; they just weren’t what I expected.  Something was off besides the frosting being way too sweet! I felt like my tooth was going to rot as soon as I bit into one. My husband took all 22 cupcakes to his softball game and returned with an empty tray.  That’s not necessarily good news considering it was 9:45 at night and the majority of the guys do not eat before the game so I’m sure they would have eaten anything put out in front of them! The general consensus was that the cupcakes were very sweet. Definitely not what I want to feed my one year old or his adorable little buddies.
Aside from the frosting, which I feel can be tweaked by simply adding less powdered sugar, the actual cupcake recipe stumps me. Instead of coming out light and fluffy, they almost tasted like pound cake minus the flavor and they didn’t rise. But this again, could have been my fault. Maybe, I didn’t incorporate the egg whites properly into the batter or maybe opening up the oven door to take a peek at the cupcake’s progress was a “no-no”.  Another thing I know I goofed on was not lining the muffin pan with cupcake liners.  Common sense told me to do so but I second-guessed myself when Alton Brown was saying not to grease the cups.  Later I realized, he was referring to actual mugs not a muffin pan. We live and we learn! 
Calling all bakers! I would really love to hear from you. Help! Where did I go wrong? If you have some advice or suggestions or a new cupcake recipe for me to try, I am all ears! I have until March 5th to create a perfect cupcake from scratch otherwise, I will be taking the box cake mix route.  
The following is a detailed step-by-step synopsis of the "Honey, I Shrunk the Cake" videos and the Chiffon Cupcake recipe found on the Food Network website. If you would like to follow along with the videos, you can find them below my instructions.


Vanilla Frosted Chiffon Cupcakes


You will need for 24 cupcakes:

Dry Ingredients:

  • 5 1/4 ounce of cake flour
  • 1 tsp of kosher salt
  • 1 1/2 tsp of baking powder (aluminum free)
  • Food scale that can measure .1 ounce
Batter:
  • 5 large eggs
  • 1/4 cup of vegetable oil
  • 1/4 cup of water
  • 1 tsp of vanilla extract
  • 5 ounces of sugar
Egg whites:

  • 5/8 tsp of cream of tartar
  • 1 ounce of sugar
Hardware:

  • 2 muffin pans
  • Food scale that can measure .1 ounce
  • Stand Mixer with a paddle attachment (A.K.A. Flat Beater) and/or hand mixer with a whisk attachment
  • Sifter or a metal strainer, as in my case
  • 2 large mixing bowls
  • 2 medium bowls for splitting the egg white mixture into thirds
  • 2 small bowls for separating the egg whites
  • Rubber spatula
  • Cupcake paper liners
  • Ice cream scooper (optional)
  • Toothpick


    If you are making the frosting, you will need:

    • 6 ounces of room temperature unsalted butter, which is about a stick and about 1 Tbsp of another stick of butter
    • 1 large egg, room-temperature 
    Directions:

    • Preheat oven to 325 degrees.

    • Place paper liners into two 12 cup muffin pans.
    • If you are making frosting, take out a stick and a half of butter as well as an egg because they need to be room temperature.
    Prepare dry ingredients:

    • Measure 5 1/4 ounces of cake flour on your scale along with 1 teaspoon of kosher salt and 1 1/2 teaspoon of baking powder. Make sure it is precise.
    • In a medium bowl sift the flour, baking powder, and salt.
     
    • Whisk the flour, baking powder and salt together and set it to the side.
    Prepare wet ingredients:

    • Get your two small bowls ready. Separate the egg yolk from the egg whites.  Crack the egg, drain out the egg whites into a one small bowl using the egg shell and drop the egg yolk into the other bowl. Try to make sure that the egg yolk does not accidentally mix into the egg whites. If it does, just scoop it out.


    • Now, transfer the egg yolks into a large mixing bowl and pour in 5 ounces of sugar.
    • Beat the yolks and sugar with a hand mixer until the mixture is a pale yellow color and see ribbons when you lift the mixer in the “off” position.


      • Add 1/4 cup of water, 1/4 cup of vegetable oil and 1 teaspoon of vanilla extract and beat to combine until smooth.
      Combine the dry and wet ingredients as follows:

      • Add the flour, baking powder and kosher salt mixture a little bit at a time to avoid it going all over the place. Beat until blended together. Set the batter to the side.


        Now for the egg whites:

        • Change the attachment on the blender to a whisk. Transfer the egg whites into a large mixing bowl. 
        • Measure 5/8 teaspoon of cream of tartar and 1 ounce of sugar.
        • Add cream of tartar and whisk the egg whites on a high speed until they become foamy.
        • Decrease the speed to low and while gradually adding the ounce of sugar.
        • Now, increase the speed to high and continue whisking for about 2 minutes until stiff peaks form.


          Combine the egg whites with the batter as follows:

          • Separate the egg white mixture into thirds. Easiest way to do this is by placing one third of the mixture into 2 separate medium bowls and leaving the last third in the bowl you are already using.


            • Grab a whisk and pour in the first bowl of egg whites into the batter and whisk in quickly until combined.


              • Now, grab a rubber spatula and pour the second bowl of egg whites into the batter and gently push your spatula down and fold over while rotating the bowl.  Try to do this as few times as possible.


                • Next, pour in the last bowl of egg whites and gently fold them in with the spatula even quicker then before without over-beating it. If a little egg white foam is visible, that’s okay.


                  • Take the ice cream scoop and fill the muffin pans with the batter. If you are not using an ice cream scoop, then fill the muffin pans 3/4 of the way. 


                    • Place the muffin pans on the middle rack of the oven and bake for 30 minutes or so the recipe says.  Alton Brown also said not to open the oven door because the chiffon will fall but I did not listen because my gut feeling said to check on them. I took my cupcakes out at 20 minutes and I am glad I did because they seemed overdone. I would use your best judgment.  If you know your oven tends to bake things faster than a recipe calls for, then check on them sooner.  It’s a risk but so is leaving the cupcakes in there for the full duration and finding them burnt to a crisp. So, my ultimate recommendation is to check on them after 15 minutes by sticking a toothpick into the center of the cupcake.  If it comes out clean, they’re done! 


                      • Allow the cupcakes to completely cool before frosting them.


                        Vanilla Frosting

                        You will need:

                        • 6 ounces of room temperature unsalted butter
                        • 2 ounces of shortening
                        • 1 room temperature large egg
                        • 1 pound of powdered sugar, which in my opinion is way too much because the frosting was extremely sweet
                        • 1 tsp of vanilla extract
                        Hardware:

                        • Large mixing bowl
                        • Food scale that can measure .1 ounce
                        • Stand Mixer with a paddle attachment or hand mixer
                        • Rubber spatula
                        Directions:

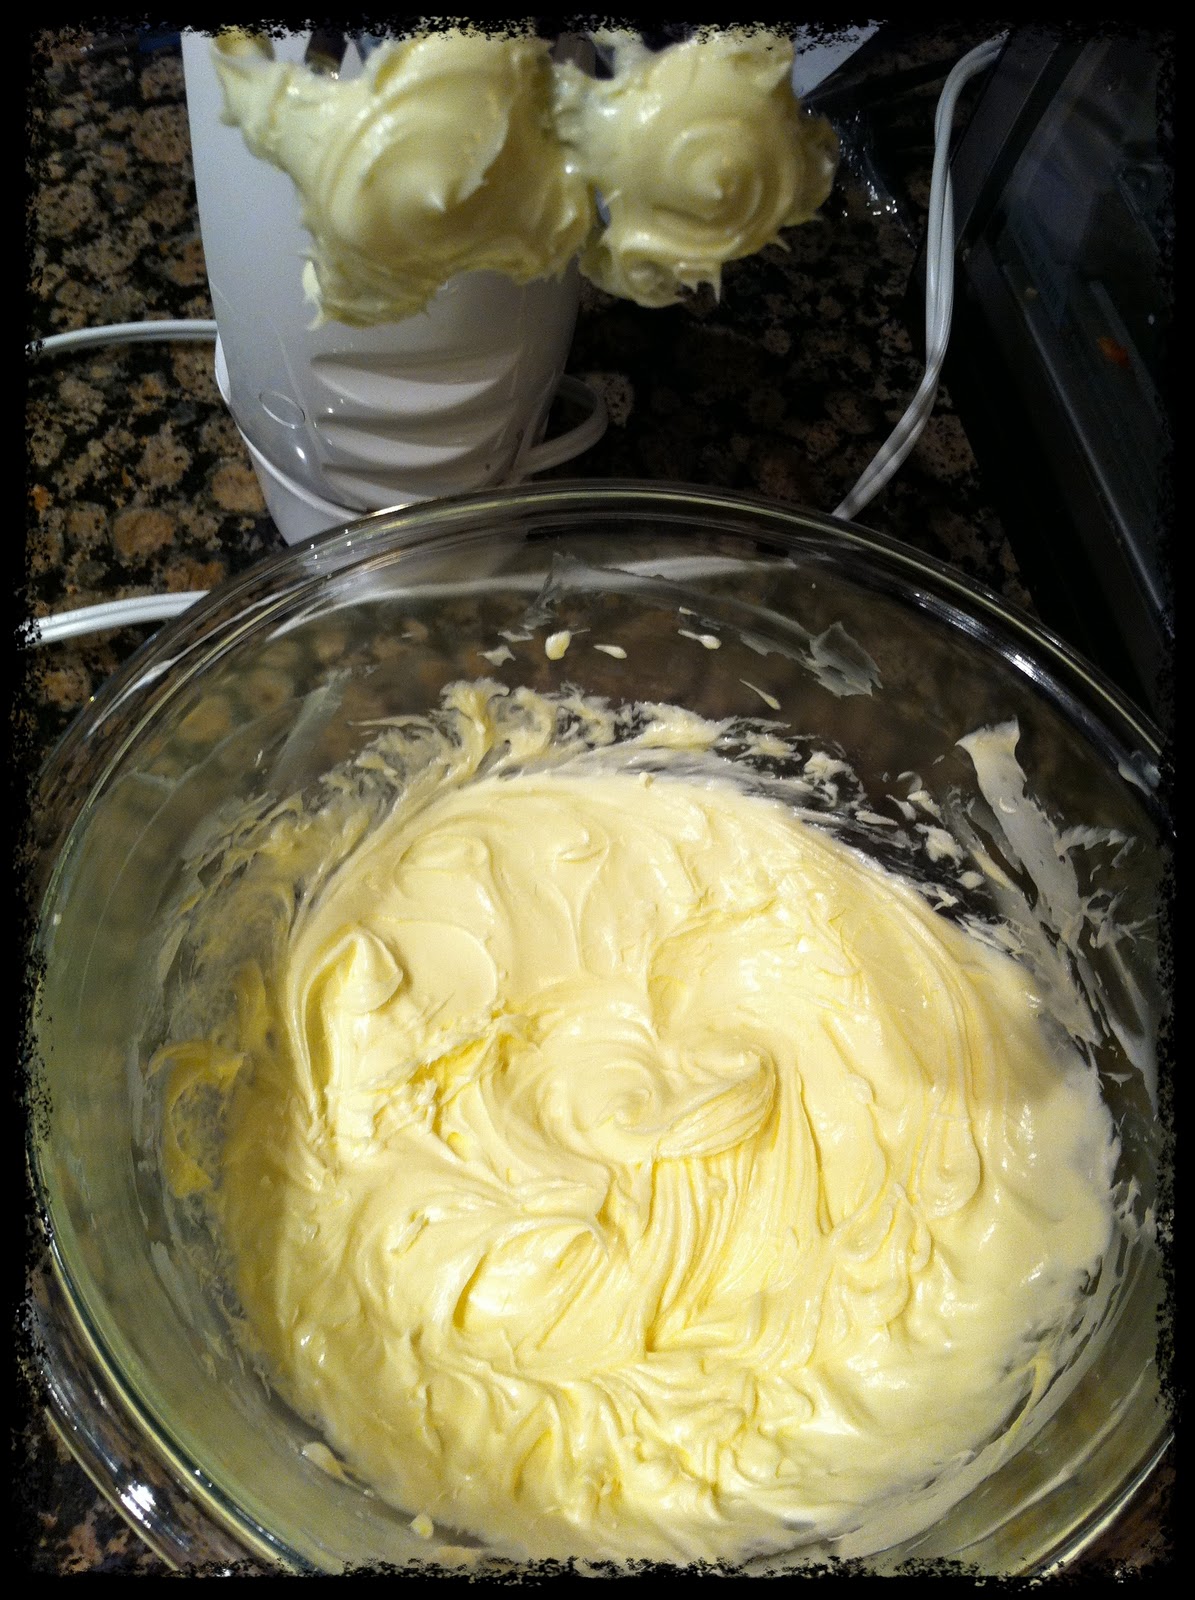
                        • In a large mixing bowl, combine 6 ounces of room temperature unsalted butter and 2 ounces of shortening and cream on high until light and fluffy using the paddle attachment or in my case, a hand mixer. With a paddle attachment, Alton Brown says it should take 3-4 minutes.


                          • Decrease the speed of the stand mixer (or turn off the hand mixer) and add one room temperature egg. Beat for a couple minutes on a high speed until well-combined.


                            • Turn off the mixer and add the powered sugar half cup at a time.  Slowly turn on the machine so the sugar doesn’t fly all over the place. Blend each half cup in before adding another one. Continue adding the powdered sugar until its gone.


                              • Now, turn the machine on a low speed or turn off the hand mixer and add 1 teaspoon of vanilla extract.  Turn the machine back up to high speed and beat the frosting until it is smooth and light, about 3 minutes.


                                • Apply the frosting to the cupcakes or you can refrigerate it for a couple days.  If you refrigerate it, make sure it is room temperature before spreading it onto the cupcakes.


                                  Next week, I hope to try out a new cupcake recipe, hopefully one that you share with me.