Sunday, March 27, 2011

Brown Sugar Glazed Pork Chops

Made a surprisingly quick and easy dinner the other night.  Brown Sugar-Glazed Pork Chops. This goes down as one of my top ten favorite recipes for the simplicity and taste factor!
I was inspired after watching Sunny Anderson make Sweet Glazed Butterflied Chicken on her show, “Cooking for Real”.  I didn’t have allspice, apple cider vinegar, or chicken on-hand so with some quick-thinking and risk-taking, I morphed the recipe into Brown Sugar Glazed Pork Chops. 
Don’t let the ingredient list or steps fool you. Timing is everything and if you follow my instructions step-by-step, these delicious bad boys will be out on your table in no time! Serve with mashed potatoes and your favorite vegetable.


Brown Sugar Glazed Pork Chops


What you will need for 6 pork chops:

  • 6 thin-sliced pork chops
  • 2 Tbsp grated onion
  • 1 garlic clove, grated
  • 1/16 tsp of cinnamon
  • 1/16 of nutmeg
  • 1/4 tsp of brown mustard
  • 1/4 cup of light brown sugar
  • 2 tsp of applesauce
  • 1/4 tsp of vinegar
  • 3 tsp of butter
  • hot sauce
  • 1 egg
  • 1 cup of bread crumbs
  • Salt and pepper
  • Scallion for decoration, optional
Hardware:

  • Large frying pan
  • Small pot
  • 2 small plates for breading the pork chops
  • Microplane or grater
  • 1 meat tenderizer
  • whisk or fork 
  • Plastic wrap, optional

Directions:
Prep the ingredients for the sauce:

  • Using either a microplane or the smallest slots of a cheese grater, grate about 2 teaspoons of an onion and a clove of garlic.

  • Measure out 1/16 of teaspoon cinnamon and 1/16 of a teaspoon of nutmeg. Set to the side.
  • Mix 2 teaspoons of applesauce with 1/4 of a teaspoon of vinegar.
  • Measure out 1/4 cup of the brown sugar.
  • Measure 1/4 of a teaspoon of brown mustard.
Prepare the pork chops:

  • Wash the pork chops and dry them off.
  • Line the pork chops on a cutting board and cover them with plastic wrap.
  • Pound both sides of the pork chops with the meat tenderizer to flatten and tenderize them.
  • Remove the plastic wrap and season each side of the pork chops with salt and pepper.
  • Heat up a large frying pan on medium-high heat.
  • Beat an egg on one plate and pour a cup of breadcrumbs on another plate.
  • Dip both sides of the pork chops with egg and coat with breadcrumbs.
  • Fry pork chops on each side for 2-5 minutes depending on the thickness and cover when done.

Start the sauce:

  • Melt butter in a small pot. Add the onion, garlic, cinnamon and nutmeg.
  • Lightly sauté the onions and garlic. Don’t let it brown. I had to remake the sauce because the onions burned. The pork chops were not ready in time so I kept the sauce on a low heat which was not a good idea. The ingredients separated and the onions turned black so it is important to glaze the pork chops with the sauce right away.
  • Pour in the sugar, mustard and desired amount of hot sauce
  • Stir to combine all the ingredients and cook on low heat for a couple minutes.
  • Glaze the pork chops with sauce. Top with a few scallions for decoration, if desired.

I am currently in New York and New Jersey. I had hoped to post a fun April Fool's idea this week but due to timing constraints, I will save it for next week. Stay tuned!

Sunday, March 20, 2011

Corned Beef & Cabbage Followed by Irish Car Bombs

If you, too, are suffering from flu-like symptoms, you have my sympathy!  It has been years since I have been this sick and now to make matters worse, my baby boy is suffering through a fever, a new tooth coming in, and his very first ear infection. Not so fun! According to my son’s pediatrician, this is the worst flu and cold season we’ve seen in the last 30 years. 
It was a bummer to be sick and have a sick baby especially this week because my brother and his girlfriend were down for a visit. We made the best of it, though.  I attempted to make Corned Beef and Cabbage for the first time on St. Patrick’s Day.  According to my half-Irish husband, I succeeded but not without some quick last minute adjustments to the original recipe!  
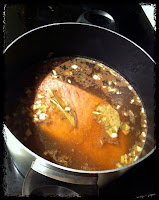
Instead of boiling the meat in water, I decided to get creative and pour in a bottle of beer, beef stock and pour in water to cover the meat.  After what seemed like an eternity to boil, I cut off a little piece for my husband to try.  He did not look too thrilled.  He tasted the beer and wasn’t too crazy about it so I quickly pulled the cabbage and brisket out of the beer and stock bath to rid them both of the beer flavor. I, then, transferred just the brisket into a pot of boiling water since the cabbage was done cooking but the brisket still had a ways to go before it was fork-tender. The end result was a delicious corned beef which was flavored nicely by the beef stock minus the memory of it ever being cooked in beer for the past three hours. 
I followed the Grobbel’s Corned Beef and Cabbage recipe on the label of the Flat Cut Corned Beef Brisket package for the most part.  Here is a video from their website if you would like to follow their recipe.
Corned Beef and Cabbage


You will need 4-6 servings:
  • 3-4 lb. Corned Beef Brisket
  • 1 32 oz. carton of beef broth
  • 1 head of green cabbage, quartered
  • 6-8 red potatoes, cut into thirds
  • 6-8 carrots, cut into thirds
  • 2 bay leaves
  • water
  • 1 bottle of good beer, optional

Hardware:
  • Large pot

Directions:

Prepare the vegetables:
  • Peel the carrots and cut them up into thirds.
  • Discard the wilted layers and core of the cabbage and cut into four pieces. 
  • Wash the potatoes and cut them into thirds.

Corned Beef:
  • Remove Corned Beef from package, rinse with water and place in a large pot.
  • Pour in one bottle of beer (optional) and beef broth
  • Pour enough water to cover the meat. 
  • Pour in the spice packet that was enclosed with the corned beef, bay leaves, and bring to a boil.

  • Reduce to simmer and cover the meat. Simmer for about 2 1/2-3 hours or until fork tender.  Towards the last 30-45 minutes, toss in the carrots, potatoes, and cabbage. 
  • Remove the corned beef from the pot and let it stand for 10 minutes.
  • Slice thinly against the grain and serve.

To end the night, some of us enjoyed an Irish Car Bomb (or three!) made of Guinness beer and Bailey’s Irish Creme minus the Jameson Whiskey. A typical Irish Car Bomb is made by pouring in half whiskey and half Bailey’s into the shot glass. Here’s my version:
Irish Car Bomb


You will need for 4 servings:
  • Bailey’s Irish Creme
  • 4 Guinness Draught Beers

Hardware:
  • 4 pint glasses
  • 4 shot glasses
Directions:

  • Pour the beer into the large glass a third of the way and allow it to settle.

  • Fill a shot glass with the Bailey’s.
  • Drop the shot glass into the beer!


  • Chug quickly or it will curdle!


Next week, look for a fun way to delight your loved ones for April Fool's Day!

Sunday, March 13, 2011

Recap of Froggie-Themed Birthday Weekend

Last week was pretty hectic but I would do it all over again! My son's first birthday and birthday party were amazing thanks to wonderful family and friends who made it so special. I had lots of fun baking and decorating a frog smash cake and frog cupcakes.  I found so much inspiration online like this adorable frog cake and froggie cupcakes i just had to try.  Mine came out a little different but I was happy with the results. 


My main focus was decorating so I took the cake mix route, Duncan Hines, to be exact. The cake and cupcakes came out great! They were super moist, fluffy and delicious! A special thank you to my sister-in-law for her great tip! As per her suggestion, I filled a pan with water, about halfway, and placed it on the lower rack of the oven along with the cupcakes. The steam kept them nice and moist!  


Froggie cupcakes: For the eyes, I cut up a marshmallow into fours and stuck a chocolate morsel into the center of each one.  For the mouth, I used a Twizzler Pull and Peel. I put two cupcakes aside for the smash cake.


Smash cake: The smash cake had a banana cream pudding filing with fresh banana slices. The eyes were two cupcakes with Oreo cookies as eyeballs.  


Here are a few pics of the frog smash cake, froggie cupcakes, frog-shaped rice crispy treats, and the favor bag creations:

Frog "smash Cake" on display along with adorable cookies made by my sister-in-law (SIL), Michelle.


Sheet cake was from Costco.
Vanilla and chocolate cupcakes with buttercream frosting

Ghirardelli white chocolate coated rice crispy treats

Cute froggie bag courtesy of SIL, Chelly
Goodie bags and  CD Mix of children songs
Next week, I will be attempting a traditional St. Patrick's Day Meal.  Check back to see how it came out!

Thursday, March 3, 2011

Bacon-Wrapped Shrimp & Roasted Jalapeño with Cheese Dipping Sauce

Happy birthday to my little munchkin who turned ONE yesterday! This week is both an exciting one and a very busy one for me.  My little baby is no longer a baby! Oh, where does the time go? 
I had every intention to make cupcakes from scratch but that is not going to happen at this point.  I baked cupcakes and made a frog cupcake cake for my son's birthday yesterday and need to bake and decorate another round of cupcakes and a small "smash cake.  I also want to make frog-shaped Rice Krispie cereal treats. Did I mention I also have a mid-term for my class this week? 
Since my theme of this week is parties, a tasty appetizer comes to mind. Claire Robinson’s “Bacon Prawns with Cheese Dip" are wonderful!   Although it is not appropriate for a one year old birthday party, these will definitely make a debut at the next party I host. 

I was excited when I saw this recipe on Claire’s show “5 Ingredient Fix” because it reminded me of the most amazing bacon-wrapped shrimp I once had at a party a couple years ago.  Claire’s shrimp were just as succulent! Even though, Claire wrapped a Jalapeño in her shrimp, it was not too spicy, at least not for me.  I am not too crazy about spicy food in general but I figured the roasted Jalapeño wasn’t going to be too bad, which it wasn’t.  I recommend washing your hands right after working with the Jalapeño!  
I made some minor changes to the original recipe based on my experiences.  I also included directions on how I roasted the Jalapeños
Bacon-Wrapped Shrimp & Roasted Jalapeño


You will need for 16 servings:
  • 16 thick slices of bacon
  • 8 roasted Jalapeños, split in half and seeded
  • Olive Oil
  • Salt and Pepper 
  • 16 large shrimp, peeled and deveined
  • 1 1/2 cups shredded Monterey jack cheese 
  • 3/4 cup heavy cream
Hardware:
  • Non-stick baking sheet
  • Toothpicks
  • Paper towel
  • Glass bowl
  • Small pot (optional, you will need this if you are melting the cheese on the stove top.)
Directions:
  • Preheat the oven to 400 degrees.
  • Place the bacon on a baking sheet. Bake until they are half cooked, about 5 minutes or more depending on the cut of the bacon. Drain on a paper towel and set aside until cool enough to handle.


Now, roast the Jalapeños:
  • Turn the oven temperature up to 425 degrees.
  • Cut the tops off of the Jalapeños. Next, cut them into half and remove the seeds.


  • Place the Jalapeño halves on the baking sheet. Drizzle olive oil over the Jalapeños and season with salt and a little pepper.

  • Roast the Jalapeños for about 10-12 minutes. Allow them to cool.

Putting all the ingredients together:
  • Assuming the shrimp have been peeled and deveined, place the roasted Jalapeños around the shrimp and wrap a strip of bacon around the shrimp.  

  • Secure with a toothpick and place them down on a non-stick baking sheet.


  • Bake until the shrimp are cooked, about 10 minutes.  They will turn white.

The cheese sauce:
  • Combine the cheese and heavy cream and microwave it for a minute or two just long enough for it to be fully melted. Stir it to fully blend the cheese and cream. You can also put the bowl over a pot of simmering water, as Claire suggests.  Make sure the bottom of the bowl is not touching the water.  Slowly stir the cheese until it is melted and blended with the cream. 
  • Serve the cheese dip along side of the shrimp and enjoy.